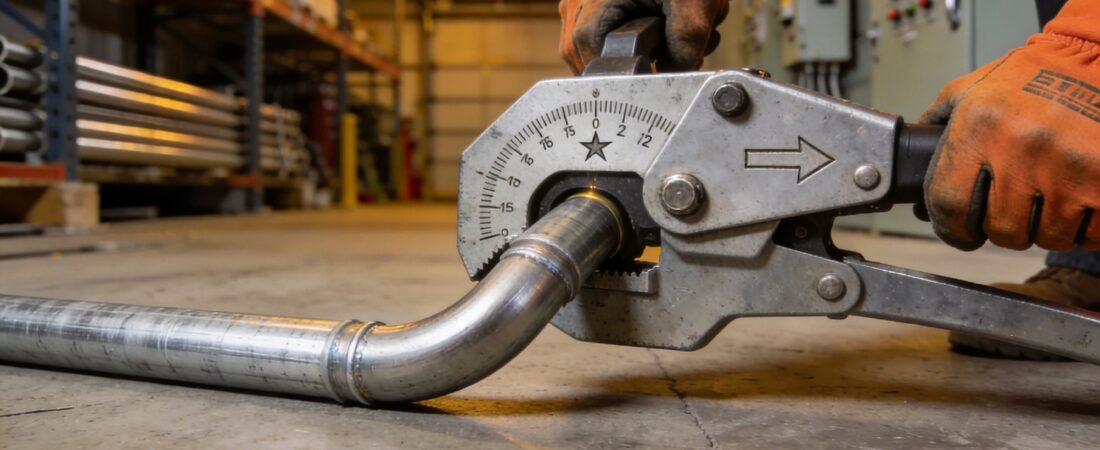
How to Bend EMT Conduit With a Pipe Bender: Complete Step-by-Step Guide
Electrical Metallic Tubing (EMT) is the backbone of commercial and residential electrical installations. Whether you are running conduit through a warehouse ceiling, routing wires around HVAC ducts, or bringing power up to a junction box, knowing how to bend EMT conduit with a pipe bender is a non-negotiable skill for any electrician.
This guide covers everything from choosing the right bender to mastering advanced bends like offsets, saddles, and parallel runs. Every technique below is backed by NEC code requirements and decades of field-proven practice.
What Is EMT Conduit and Why Does It Need Bending?
EMT (Electrical Metallic Tubing) is a thin-walled, unthreaded steel or aluminum raceway used to protect and route electrical wiring. Unlike rigid metal conduit (RMC) or intermediate metal conduit (IMC), EMT has a thinner wall gauge, making it lighter, easier to cut, and far simpler to bend by hand.
Common EMT sizes for most installations:
| Trade Size | Outside Diameter | Wall Thickness | Typical Use |
|---|---|---|---|
| 1/2″ | 0.706″ | 0.042″ | Residential, light commercial |
| 3/4″ | 0.922″ | 0.049″ | Commercial branch circuits |
| 1″ | 1.163″ | 0.058″ | Industrial, feeders |
| 1-1/4″ | 1.510″ | 0.065″ | Large feeders, service entrance |
Why bend instead of using fittings?
Every elbow, coupling, or connector you add to a conduit run creates a pull point. More pull points mean more friction when pulling wire, which can damage conductor insulation and make future maintenance a nightmare. A clean bend, by contrast, provides a smooth, continuous path for wires while maintaining the professional appearance that inspectors and clients expect.
NEC Article 358 governs EMT installations and sets the minimum bending radius at 6 times the trade size for standard EMT. For 1/2″ EMT, that means a minimum bend radius of 3 inches. Violating this rule risks damaging the conduit and failing inspection.
Choosing the Right EMT Pipe Bender
Not all pipe benders are created equal. The bender you choose directly impacts bend quality, your physical fatigue, and how quickly you can complete a job.
Hand Benders (Manual)
For 1/2″, 3/4″, and 1″ EMT, a manual hand bender is the industry standard. These tools use a long handle for leverage and a precisely shaped shoe that cradles the conduit during bending.
What to look for:
- Shoe material: Ductile iron lasts decades but adds weight. Aluminum is lighter for all-day use but wears faster on abrasive surfaces.
- Handle grip: Non-slip, ergonomic grips reduce hand fatigue during high-volume bending.
- Degree markings: Cast-in markings (not printed) survive job-site abuse. Look for clear 0°–90° indicators plus a reference arrow, star, and rim notch.
- Foot pedal: A wide, textured pedal gives stable footing when applying pressure.
Top choices by use case:
| Scenario | Recommended Type | Why |
|---|---|---|
| 10–20 bends per day | Standard aluminum hand bender | Lightweight, affordable, reliable |
| 50+ bends per day | Heavy-duty ductile iron bender | Durability, consistent shoe geometry |
| Complex multi-bend layouts | Bender with multi-angle reference marks | Saves layout time |
| Large-diameter EMT (1-1/4″+) | Mechanical or hydraulic bender | Human leverage is insufficient |
When to Upgrade to a Mechanical or Hydraulic Bender
Manual bending works great up to 1″ EMT. Once you hit 1-1/4″ or larger, the force required exceeds what most electricians can comfortably apply. Mechanical benders use a ratcheting mechanism for controlled bends, while hydraulic benders deliver consistent, repeatable force for high-volume production work.
Understanding Your Bender’s Markings
Before you make a single bend, you need to speak the language of your bender head. These markings are not decorative—they are precision reference points.
| Marking | Purpose | Used For |
|---|---|---|
| Arrow | Aligns with your bend start mark | 90° stub-ups, offsets, kick bends |
| Star | Reference point from the back of a completed bend | Back-to-back 90° bends |
| Teardrop / Rim Notch | Center reference for saddle bends | 3-point and 4-point saddles |
| Degree Scale | Visual angle indicator (0°–90°) | Verifying bend angle during and after bending |
Pro tip: Take a scrap piece of EMT and practice aligning each marking before your first production bend. This 5-minute exercise prevents costly layout errors on the actual job.
The Five Essential EMT Bends (Step-by-Step)
1. The 90° Stub-Up Bend
The stub-up is the most common bend in electrical work. It brings conduit vertically from a floor or wall up to a junction box, panel, or fixture.
Step-by-step:
- Determine your stub height — the vertical distance from the floor to the top of the bend (e.g., 12 inches).
- Subtract the take-up value — this is the length of conduit consumed by the bend itself:
- 1/2″ EMT: subtract 5″
- 3/4″ EMT: subtract 6″
- 1″ EMT: subtract 8″
- 1-1/4″ EMT: subtract 11″
- Mark the conduit at the adjusted measurement (e.g., 12″ − 5″ = 7″ from the end for 1/2″ EMT).
- Insert the conduit into the bender with the arrow aligned to your mark.
- Step on the foot pedal and pull the handle steadily until the degree scale reads 90°.
- Verify with a level or speed square — adjust if needed before releasing.
Springback compensation: EMT springs back 3°–5° after bending. Overbend slightly (about 93°–95° on the scale) and let the conduit settle to a true 90°.
2. The Back-to-Back 90° Bend
Used when conduit must go up, across, and back down — such as over a doorway, through a wall, or around a structural beam.
Step-by-step:
- Make your first 90° stub-up as described above.
- Measure the back-to-back distance — the outside-to-outside distance between the two vertical legs of the U-shape.
- From the back (outside) of the first bend, measure this distance and mark the conduit.
- Flip the bender so it faces the opposite direction. Align the star marking with your new mark.
- Bend to 90°, keeping the conduit in the same plane as the first bend (no twist).
Common mistake: Measuring from the inside of the first bend instead of the outside. The back-to-back measurement must always be outside-to-outside, or your legs will be too far apart.
3. The Offset Bend (Z-Bend)
Offsets shift the conduit path up or down to clear an obstacle — a pipe, beam, duct, or structural element — while keeping the overall run level.
The offset formula:
You need two numbers: the offset height (how high you need to clear the obstacle) and the offset multiplier (based on your bend angle).
| Bend Angle | Multiplier | Shrink per Inch of Offset |
|---|---|---|
| 10° | 6.0 | 1/16″ (0.063″) |
| 22.5° | 2.6 | 3/16″ (0.188″) |
| 30° | 2.0 | 1/4″ (0.250″) |
| 45° | 1.4 | 3/8″ (0.375″) |
| 60° | 1.2 | 1/2″ (0.500″) |
Example: Clearing a 4″ obstacle with 30° bends
- Shrink = 4″ × 0.250″ = 1″
- First mark = distance to obstacle + shrink = 20″ + 1″ = 21″ from the end
-
Second mark = first mark + (offset height × multiplier) = 21″ + (4″ × 2.0) = 29″
-
Mark both points on the conduit.
- Align the arrow with the first mark and bend to 30°.
- Flip the conduit 180° in the bender shoe.
- Align the arrow with the second mark and bend to 30° in the opposite direction.
Why 30° is the sweet spot: It provides a good balance between clearance height and run length. Steeper angles (45° or 60°) create more shrink and use more conduit; shallower angles (10° or 22.5°) require more distance between bends and may not clear the obstacle.
4. The 3-Point Saddle Bend
Saddles route conduit over round obstacles — another pipe, a round duct, or a structural column — while returning to the original run line.
Step-by-step:
- Mark the center of the obstacle on the conduit.
- From the center, mark both sides at a distance equal to the obstacle’s radius (or use the saddle chart for your specific bender).
- Align the teardrop/rim notch with the center mark and bend to 45°.
- Flip the conduit. Align the arrow with one of the side marks and bend to 22.5°.
- Flip again and repeat for the other side mark, bending to 22.5° in the opposite direction.
The result is a smooth arch that clears the obstacle and returns to the original line.
5. Parallel Offset (Conduit Rack Bending)
When running multiple conduits side by side — a common sight in commercial electrical rooms — each successive conduit must be adjusted to maintain equal spacing through the bends.
The parallel offset formula:
Adjustment = Conduit spacing × tan(bend angle ÷ 2)
For 30° offsets with 2″ center-to-center spacing:
Adjustment = 2" × tan(15°) = 2" × 0.268 = 0.54"
Each subsequent conduit’s bend marks shift by 0.54″ to keep the rack parallel through the offset.
Troubleshooting Common EMT Bending Problems
Kinking
Cause: Applying force too quickly, using the wrong bender size, or bending on an unstable surface.
Fix: Use smooth, gradual pressure. Ensure the bender shoe fully supports the conduit. If a kink forms, cut the conduit and start over — do not try to “un-kink” it, as the structural integrity is compromised.
Dog-Leg (Twisted Offset)
Cause: The two bends in an offset are not in the same plane. The conduit twists instead of shifting cleanly.
Fix: Before the second bend, visually confirm the conduit is flat. Use a torpedo level on the conduit after each bend to verify alignment. If the dog-leg is minor, you can sometimes correct it by applying gentle counter-pressure; for severe twists, re-bend from scratch.
Inaccurate Angles
Cause: Misaligned markings, inconsistent pressure, or ignoring springback.
Fix: Always double-check your mark against the arrow before bending. Use a digital angle finder for critical bends. Overbend by 3°–5° to compensate for springback, especially on 1/2″ EMT which springs back more than larger sizes.
Conduit Flattening at the Bend
Cause: Bender shoe does not match the conduit size, or the conduit wall is too thin for the bend radius.
Fix: Never use a 3/4″ bender on 1/2″ EMT (or vice versa). If flattening persists with the correct bender, the conduit may be substandard — switch to a higher-quality EMT brand with consistent wall thickness.
EMT Bending Best Practices from the Field
-
Always bend on a flat, stable surface. Uneven ground causes inconsistent bends and increases the risk of dog-legs.
-
Use a sharp, fine-point permanent marker for layout marks. Pencil marks smear and fade, leading to alignment errors mid-bend.
-
Keep a bending reference card in your tool bag. Print the take-up table, offset multipliers, and saddle measurements on a waterproof card. It saves time and eliminates calculation errors on busy job sites.
-
Practice on scrap before production bends. Especially when using a new bender brand, the take-up and gain values may differ from what you are used to.
-
Inspect every bend before pulling wire. Run your hand along the inside of the bend to check for rough spots, cracks, or flattening that could damage conductor insulation.
-
Store your bender properly. Wipe the shoe clean after each use to prevent metal shavings from marring future conduit runs. Check handle threads periodically — a loose handle is a safety hazard.
EMT vs. Other Conduit Types: What You Can (and Cannot) Bend
Not all conduit bends the same way. Here is a quick comparison:
| Conduit Type | Bend Method | Tools Required | Bend Radius |
|---|---|---|---|
| EMT | Cold bending | Hand bender, mechanical bender | 6× trade size |
| Rigid (RMC) | Cold bending | Hydraulic bender (for 1″+) | 6× trade size |
| IMC | Cold bending | Hydraulic bender | 6× trade size |
| PVC | Heat bending | Heat blanket, hot box | 6× trade size |
| Aluminum EMT | Cold bending | Hand bender (smooth shoe) | 6× trade size |
| Flexible Metal (FMC) | Hand bending | No tools needed | Per manufacturer |
Key takeaway: EMT is the easiest conduit to bend by hand, but the techniques and tools differ significantly from PVC (heat bending) or flexible conduit (no tools). Never attempt to heat-bend EMT or cold-bend PVC with an EMT bender — the results will be unsafe and non-compliant.
Final Thoughts
Bending EMT conduit with a pipe bender is equal parts science and craft. The math — take-up values, offset multipliers, shrink calculations — gives you precision. The feel — knowing how much pressure to apply, when to overbend, how to keep the conduit in plane — comes from practice.
Master these five bends, internalize the reference tables, and develop a habit of checking every bend before moving to the next. Your installations will be cleaner, your wire pulls will be smoother, and your inspectors will be happier.
The best pipe bender is the one that matches your workload and conduit sizes. Invest in quality markings, a comfortable handle, and a bender that fits the EMT sizes you work with most. A good bender is a career-long tool — treat it well and it will deliver precise bends for years to come.
About the Author — Leo Yang
Leo Yang has over 15 years of experience in pipe bending equipment manufacturing and has worked with electrical contractors, industrial fabricators, and construction professionals across North America and Europe. He writes practical, field-tested guides to help electricians and fabricators get the most out of their bending tools.